
Yes.
Ever since WordPress has updated to the version 4.7, it has the ‘justify text‘ option missing.
Why? Because the justified text was not giving the same readability experience across different browsers so the WordPress team decided to remove it from the tool bar.
Therefore, in this article, we have explained three simple ways to either get the button back to its place or justify the text without it.
Those three ways are:
- Using simple keyboard keys
- With the help of plugins
- Changes in coding
Let’s get straight to the methods to justify text in WordPress, the easy way.
Method 1: Using simple keyboard keys
Keys: Press ‘Alt + Shift + J’
Ok. This one is the simplest of it all. Follow this step-by-step guide.
Step 1: Simply open your post in the editor.
Step 2: Select the text you want to align with.
Step 3: Alt + Shift + J
That’s all, folks. Your text will be justified in seconds.
If you want to justify an entire post, simply select the whole post by pressing ‘Ctrl + A‘ and then ‘Alt + Shift + J.’
This method is going to work out most of the time, without any trouble.
But if, in any case, it fails to justify the text, then you can install a plugin that justifies the text.
Fortunately, all plugins designed for this purpose are effortless to use too.
Method 2: Install a Suitable Plugin
Plugins in WordPress really help you with managing your posts when you want most of the tasks to get automated.
Similarly, you can use any of these four plugins to justify text in WordPress in no time:
1. Re-add text justify button
2. Re-add text underline and justify
3. Who stole the text justify button ?
4. PRyC WP: TinyMCE more buttons
They work well with the ‘Classic Editor‘ and all work similarly by bringing the justify button back in the tool bar.
Let’s see how each of these plugins help to justify the text in a post in WordPress.
1st Plugin: “Re-add Text Justify Button.”
To make the ‘Re-add text justify button‘ plugin work, you need the ‘Classic Editor‘ instead of the ‘Block Editor‘ in WordPress.
First, install the plugin ‘Classic Editor‘ and then the “Re-add Text Justify Button” plugin.
Next, edit the selected post with the option ‘edit‘ and then ‘Edit With WordPress‘ instead of ‘Edit With Elementor‘.
To make it easily understandable, we have created a video explaining how easily we can justify text in an individual post in WordPress.
If you are more comfortable with text instructions, here is the step-by-step guide you can follow:
Installing The Classic Editor Plugin
Step 1: On the WordPress dashboard, scroll down to the plugins option and click on ‘Add New.’
Step 2: Search for ‘Classic Editor‘
Step 3: Install the Plugin
Step 4: Activate the plugin.
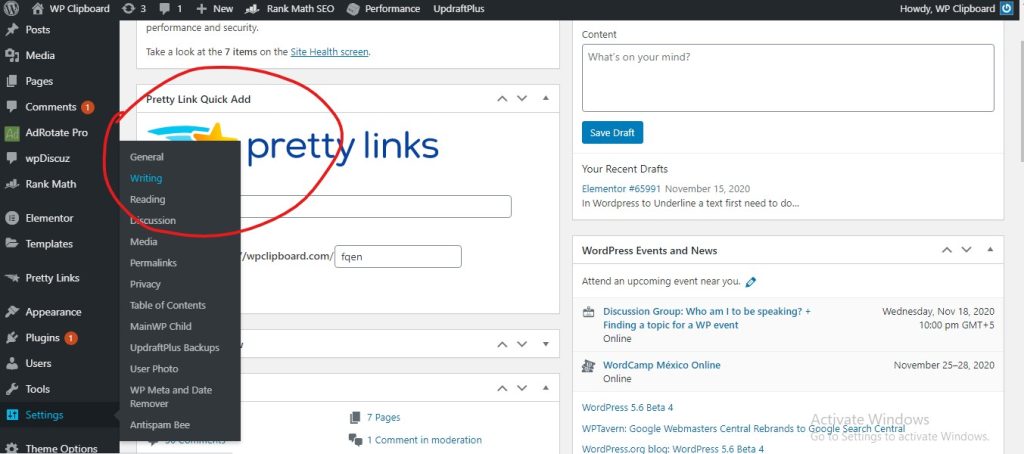
Step 5: Configure the setting. Go to Settings — Writing
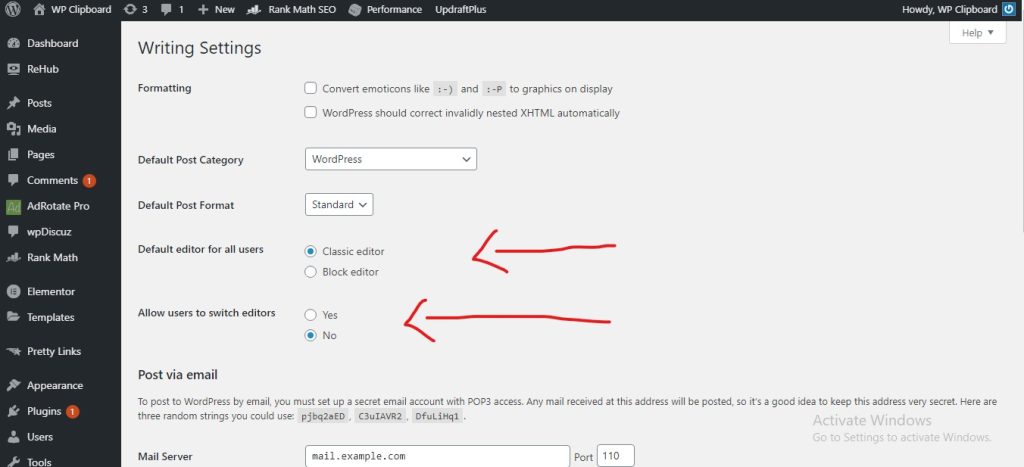
Step 6: Included two steps here.
Check the ‘Classic Editor‘ in the default editor for all users option.
Choose ‘No‘ in ‘Allow all users to switch editors‘
Step 7: Scroll down and click on ‘Save.’
Installing the Re-add Text Justify Button
Step 1: On the WordPress dashboard, scroll down to the plugins option and click on ‘Add New.’
Step 2: Type in “Re-add Text Justify Button” in the search bar on the screen’s top-right section.
Step 3: Click on ‘Install‘
Step 4: When the plugin is installed, click on ‘Activate.’
Step 5: Go to dashboard — Posts — All Post.
Step 6: Select the post you want to justify the text of.
Step 7: Click ‘Edit‘ not ‘Edit With Elementor’
Step 8: Choose ‘Edit In WordPress‘ and then click on ‘Continue.‘
Step 9: Select the text you want to justify and click on the justify button that reappears in the edit menu in the First Row of buttons, below the ‘Add Media‘ button.

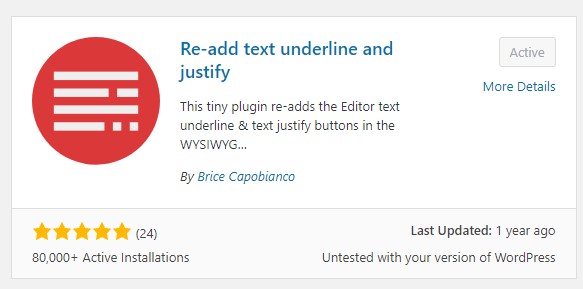
2nd plugin: “Re-add Text Underline and Justify.”
Another plugin works in the same way as the previous one is ‘Re-add text underline and justify.’
Simply install and activate the plugin and configure the settings as you did in the previous plugin.
An Additional Step:
An additional step that you will be needing to take here is to select the ‘Default – Re-add underline & justify buttons‘ in the ‘Editor Style‘ option.
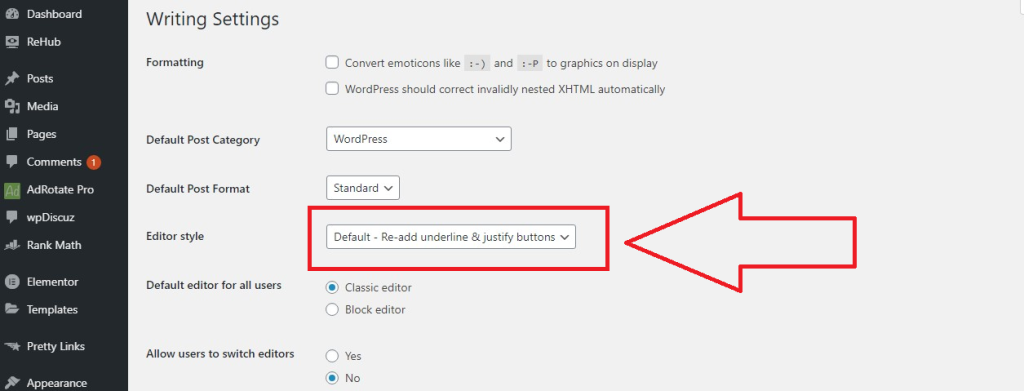
It comes with an additional feature of ‘Underline Text’ in the same menu bar where the justify symbol is inserted.

Therefore, you can easily select any text and click on ‘U’ to get it underlined.
3rd plugin: “Who Stole The Text Justify Button ?!”
Again, this plugin ‘Who stole the text justify button ?!‘ works in the same way as the previous two.
With this plugin in action, you get the justify button appear back in the editor menu bar in the ‘Second Row of Buttons’

4th plugin: “PRyC WP: TinyMCE More Buttons.”
As the name of this plugin is self-explanatory, you might get an idea that this tool is not just restricted to providing a justify button back.
Apart from underline and justify, the ‘PRyC WP: TinyMCE more buttons‘ plugin gives you many more buttons. This plugin suits you if your text has a lot more text styling variations in it.
Some of the buttons you can add back to your editor menu from this plugin’s list include:
- Strikethrough
- Horizontal line
- Paste
- Anchor
- Subscript
- Find and replace
- Superscript
- Show blocks etc
With this plugin, you get the justify button back in the editor menu’s third row of buttons.
Keep in mind that using too many WordPress Text Editor Plugins at once can sometimes cause conflicts or slow down your site, so it’s important to choose the ones that fit your needs the most and keep them updated.

Note: Activate only one plugin for the justify button at a time. If a plugin is not working, first deactivate it and then activate the other one.
Method 3: Use Simple Coding To Change The Alignment
Change text-align: left to text-align: justify
Don’t get upset if you have zero knowledge about coding.
This method of coding is really simple and takes just about two minutes to justify the text.
You simply need to go to the source code of the selected text and change the text-align: ‘left/right/center’ to justify.
Check out this video to see how easy it is.
https://www.youtube.com/watch?v=oeNXEUcg388Follow the simple steps below in written to get even more clarity:
Step 1: Go to Post — All Posts
Step 2: Select ‘Edit‘ to the post you want to justify the text of.
Step 3: Select the Text.
Here we have selected two paragraphs for an example.
Step 4: To get the source text click on the ‘Text‘ button beside the ‘Visual‘ button.

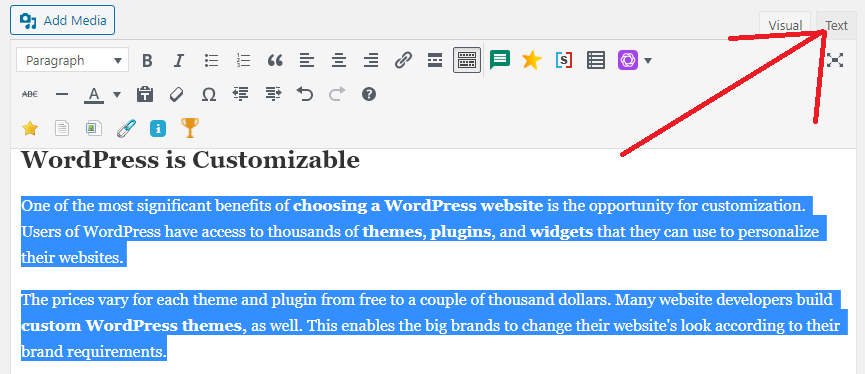
Step 5: Replace your text’s alignment from the left/right/center to ‘justify.’
Simply remove the word ‘left/right/center‘ written before the lines starting with ‘One of the most‘ and ‘The prices vary.’

This is the screenshot after the coding is replaced with ‘justify.’

And this is how the justified paragraph looks like.
See? There was nothing complex here. You can easily do it even if you are a beginner in using WordPress.
Wrap Up
Let’s give you a quick recap of how you can apply to justify your text in WordPress posts.
- Using the keys’ Alt + Shift + J.’
- Using Some Plugins
- Using coding to replace alignment state with ‘justify.’
We hope you found this guide of help to you.
Were you successful in your attempt to justify the text using any of these steps?
Let us know in the comment section below.