
So you put in a lot of time and effort to create an awesome piece of content in WordPress.
Unfortunately, as you add more articles, your masterpiece drops down in the list of blog posts.
Looking to pin one of your posts on the top of your blog?
In this tutorial, we are going to show you how you can easily make a sticky blog post in WordPress, so it displays on the top of your page.
What is a Sticky Post in WordPress?
By default, as you keep on uploading content in WordPress, the posts that you added earlier drop down in the list of your articles.
As the name suggests, a sticky post in WordPress sticks to the top of your blog page.
It is a fantastic feature to have if you want to have more views for your cornerstone or pillar content.
Why Make a WordPress Post Sticky?
You would essentially want to pin a post in WordPress to the top of your blog in the following cases:
1. Display Pillar Content on the Top of Your Blog
These are usually long, in-depth posts that support the rest of your content. Pillar posts tend to get the most views and shares, but their popularity may die down after a certain period. You also tend to link out to the other pieces of your content from such posts.
As you want to get the most views on such cornerstone content, you may want to display it on the top of your page. It would be a fantastic way to introduce new visitors to your content.
2. Show Announcements that Everyone Can View
Got a fantastic new affiliate deal you want your viewers to see?
You can make a post explaining the details of the deal and pin it to the top of your blog. And you can always choose to unstick it after a certain time period.
Sticky Posts are a fantastic way to enable more of your WordPress website visitors to view product updates and giveaways.
How to Make a WordPress Post Sticky?
There are a couple of ways you can create a WordPress sticky post.
Check out the video below to see how easy it is. If you prefer text continue reading below:
https://youtu.be/CoDCR7svhyUStep 1: From Your WordPress Dashboard, edit the post you want to stick to the top of your blog
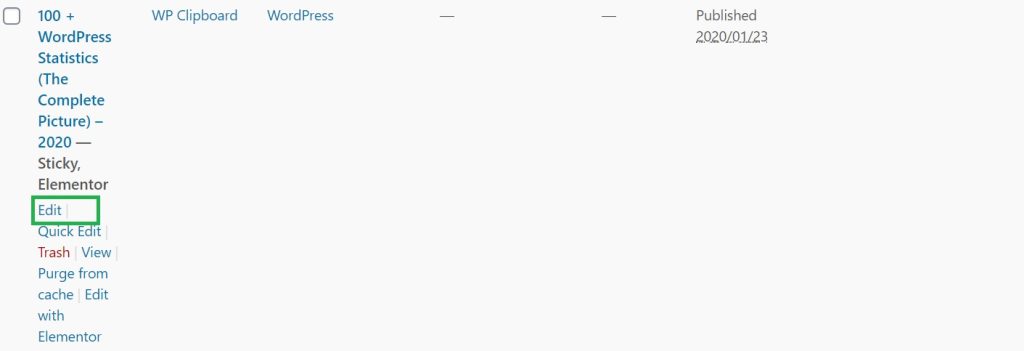
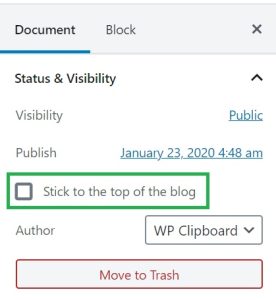
Step 2: On the right of your screen under Status & Visibility, click on “Stick to the Top of the Blog” and update
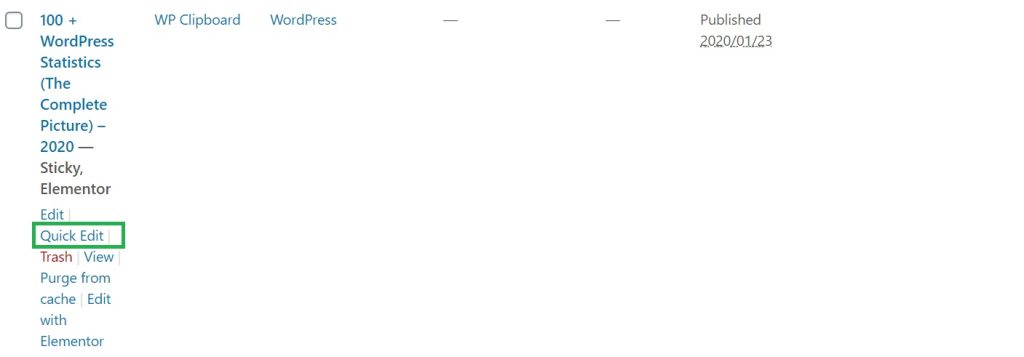
You can also get your post to stick by simply using the “Quick Edit” option as shown below. From you WordPress admin dashboard, go the post you want to edit and click on “Quick Edit“
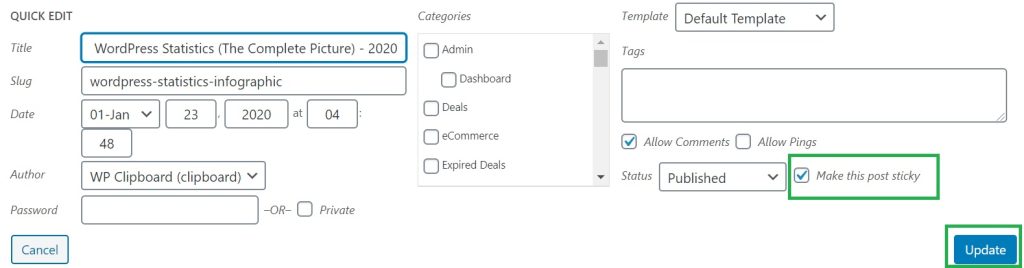
Now select “make this post sticky” and click on “Update”
You can watch the short video below
https://youtu.be/GvoGcEc4N1gIn case you want to unstick your WordPress post, follow the same steps, and uncheck the box.
BONUS PLUGIN to Show Breaking News on Top of Your Pages
Now that you know how easy it is to stick a post to the top of your blog, we will show you a fantastic plugin that enables you to display any post or page as Breaking News.
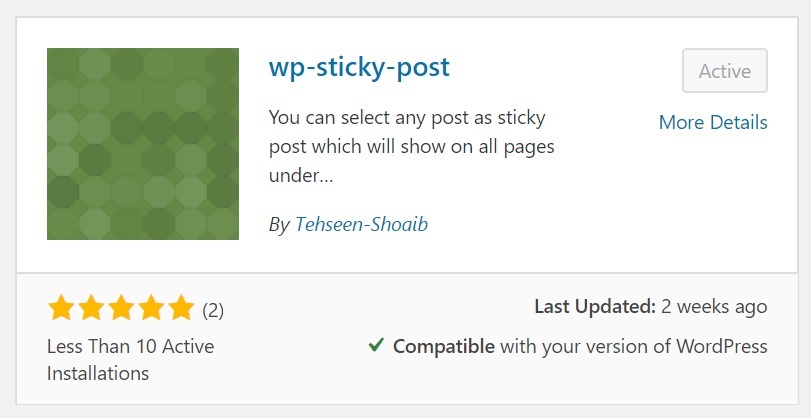
It’s a new WordPress plugin called “wp-sticky-post.”
Suppose you have a fantastic new offer for your visitors, you can create the offer and use the plugin to display it on all pages under the header.
The best part is – You can easily create a customized heading for the offer such as “Breaking News” or “Don’t Miss This Opportunity”
Let’s see how you can use this plugin step by step.
Step 1: In your admin dashboard Go to Plugins -> Add New and search for wp-sticky-post
Step 2: Install and activate the plugin
Step 3: From the WordPress dashboard, click on Sticky Post

Step 4: By default, the Sticky Post heading is shown as “Breaking News.” You can edit it and even change the background text and color

Step 5: From WordPress Dashboard, Go to Posts -> All Posts and Edit the Post you want to display on top of all pages and posts under the header

Step 6: Scroll down in the post editor and click on “Make this Post Sticky Post” so it appears checked. You can even set the expiration date of the offer, as shown in the screenshot below.

Now You can view the offer on top of all your pages. The way it appears also depends on the theme that you are using.
Were you able to find our steps helpful? Do let us know in the comments section on the bottom of this page.